Gourmet Chocolate Sablé Torchon with Sea Salt
The pursuit of the perfect sablé is a journey into the very essence of texture. Unlike a simple cookie, the sablé, derived from the French word for sand, demands a specific friability – a delicate structure that yields to the slightest pressure, melting on the tongue like a whisper. This is not achieved through mere mixing, but through a deliberate manipulation of ingredients, a culinary choreography designed to inhibit gluten development and maximize fat encapsulation.
Amateur attempts often result in a tough, chewy cookie, a testament to overworking the dough and allowing gluten to form. Our method, however, focuses on the ‘friability index’ – the precise balance of fat to flour that coats each grain, preventing hydration and the subsequent formation of elastic gluten strands. This meticulous approach ensures that each bite delivers that signature sandy, melt in your mouth sensation that defines a true gourmet sablé.
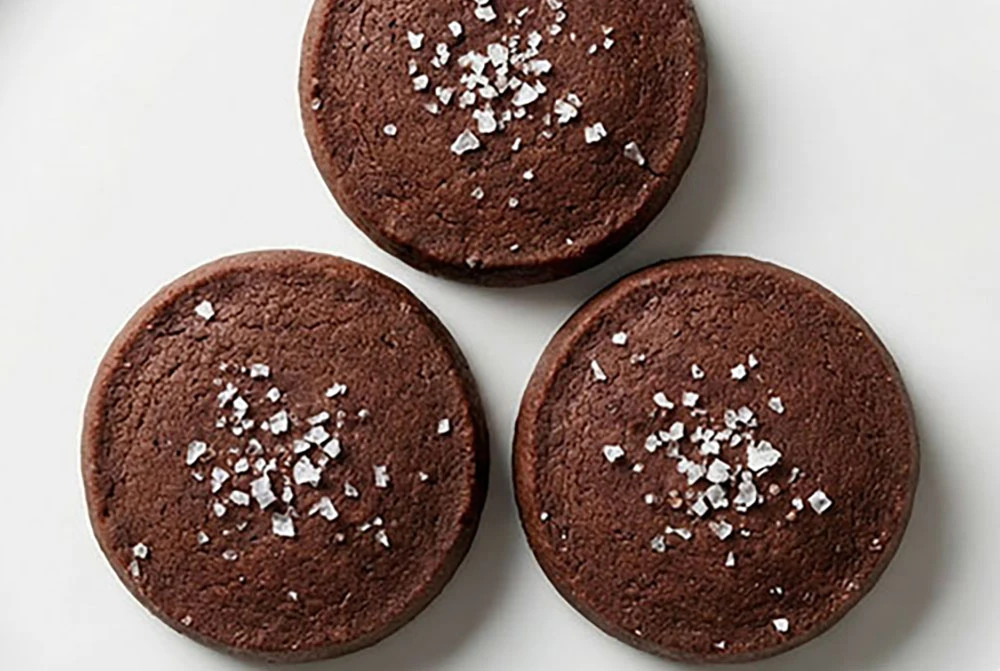
The transformation of simple ingredients into these elegant, uniformly sliced discs is a testament to technique. The chilling and shaping of the dough into a torchon is not merely for aesthetics; it is a critical step that allows the fat to solidify, ensuring clean, precise slices and preventing the cookies from spreading into amorphous shapes during baking. This is the hallmark of professional execution, where form and function are inextricably linked.
Instructions
The Foundation: Building Flavor Through Patient Creaming
Our journey begins not with haste, but with intention. In a robust mixing bowl, coax softened butter and I stress softened, not melted, a critical distinction for optimal texture with granulated sugar. Employ an electric mixer at a steady medium speed, allowing the butter and sugar to emulsify into a pale, ethereal cloud. This creaming process, taking a good 3 to 4 minutes, is where we lay the groundwork for a tender crumb. Scrape down the bowl periodically; no speck of fat should escape this foundational embrace. Following this, introduce the richness of an egg yolk, the subtle perfume of vanilla extract, and a whisper of fine sea salt. Engage the mixer on its lowest setting, just enough to marry these elements. Overworking at this stage is the enemy of a delicate sablé.
Now, for the dry components. In a separate vessel, judiciously whisk together the all-purpose flour and the deep, resonant cocoa powder. This isn’t merely mixing; it’s ensuring an even distribution, a uniform canvas for our chocolate masterpiece. Gradually, almost reverently, incorporate these dry ingredients into the wet. Maintain low speed, stopping the moment the last vestiges of flour disappear. The dough will appear crumbly, a texture that signals it’s ready for the next crucial step, not for immediate baking. An undeveloped dough is a missed opportunity.
The Art of Shaping and the Sacred Rest
Turn the nascent dough onto a pristine work surface. With your hands, the most intuitive of tools, gently gather it into a cohesive mass. Prepare a generous sheet of parchment paper, laying it flat. Place the dough onto this paper, a blank slate for our sculptural endeavor. Using the parchment as your ally, meticulously shape the dough into a tight, uniform cylinder, aiming for approximately 2 inches in diameter. Press with consistent, firm pressure, expelling any trapped air pockets. This is not just shaping; it’s engineering for perfection. Once the cylinder is flawlessly formed, wrap it with the parchment, twisting the ends with the practiced hand of a confectioner securing a precious jewel. This ensures its form and prevents any unwelcome expansion during its crucial repose.
Now, the non negotiable secret to truly profound flavor and an unparalleled texture: the rest. This dough cylinder must be chilled, and I mean thoroughly chilled, for a minimum of 2 hours, but for the truly sublime, aim for 24 to 72 hours. This extended refrigeration allows the gluten to relax and the flavors to deepen and meld, developing those complex toffee notes that distinguish a mere cookie from a gourmet creation. This is where patience is rewarded tenfold, transforming a simple dough into something extraordinary. The dough must be very firm, almost rigid, before proceeding.
The Precision Bake and Refined Finish
Preheat your oven to a precise 350°F (175°C). Line your baking sheets with fresh parchment paper, preparing them for their role. Retrieve the firm dough cylinder from its slumber. Carefully unwrap it, revealing the perfectly formed shape. Employ a razor-sharp chef’s knife, held steady and true, to slice the cylinder into uniform rounds, precisely 1/4-inch thick. Precision is paramount here; aim for geometric perfection in every slice. Arrange these pristine rounds on the prepared baking sheets, leaving about an inch of space between each, allowing them room to breathe and bake evenly.
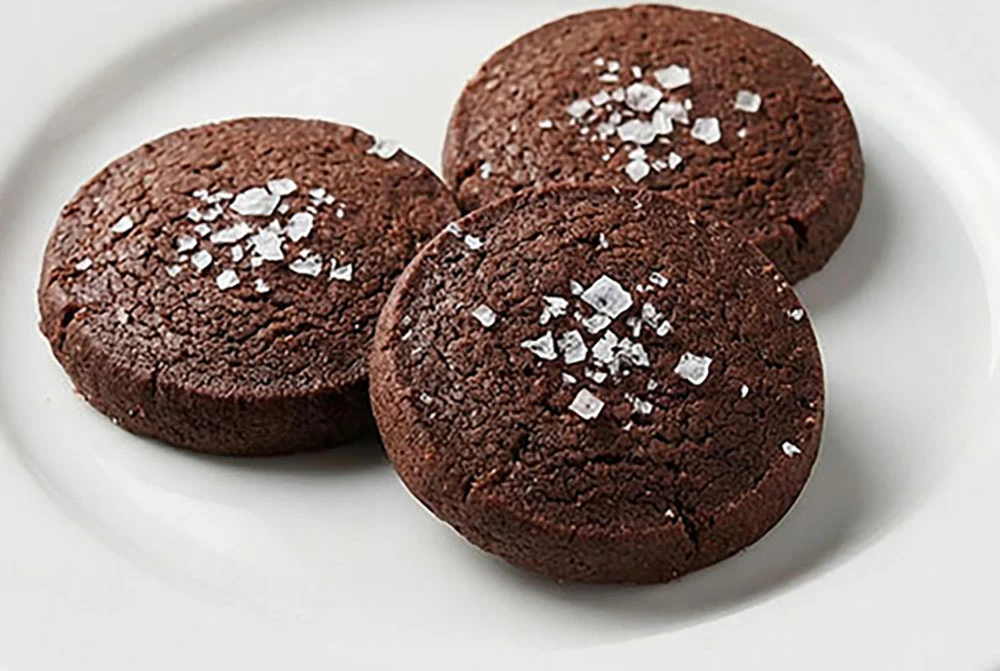
A final flourish before the heat: a delicate sprinkling of flaky sea salt atop each cookie. This is not merely seasoning; it’s a counterpoint to the deep chocolate, a burst of salinity that elevates the entire experience. Bake for 12 to 15 minutes. The edges should appear set, but the centers will retain a whisper of softness a crucial indicator of their perfect texture. Be vigilant; the cocoa can mask browning, so watch those edges like a hawk. Once baked, allow them to rest on the hot sheets for 5 minutes, letting the residual heat gently finish their transformation, before carefully transferring them to a wire rack to cool completely. Store these meticulously crafted sablés in an airtight container at room temperature for up to 5 days, though I doubt they’ll last that long.
The Chef’s Science
The critical principle at play in achieving the perfect sablé is the inhibition of gluten development. Flour, when hydrated and worked, forms gluten, a protein network that gives structure and elasticity to baked goods like bread. For a sablé, however, this is precisely what we aim to avoid. Our strategy employs a high fat to flour ratio and minimal mixing. The softened butter and sugar are creamed to incorporate air, but upon adding the flour and cocoa, we mix only until just combined. This process coats the flour particles with fat, creating a barrier that hinders their hydration and subsequent interaction, thus preventing the formation of a strong gluten structure. The result is a tender, crumbly, ‘sandy’ texture – the very definition of a sablé – rather than a chewy cookie.
Sourcing the Best
For these Gourmet Chocolate Sablé Torchon cookies, two ingredients stand out for their profound impact on the final texture and flavor: unsalted butter and Dutch processed cocoa powder. When selecting unsalted butter, opt for a high-quality European style butter with a higher fat content (typically 82% or more). Its richness and superior flavor profile are paramount. Ensure it is properly softened – pliable but not melted – to achieve the correct aeration during creaming. For the cocoa powder, Dutch processed is essential. This cocoa has been treated with an alkaline solution to neutralize its acidity, resulting in a smoother, less bitter flavor and a deeper, darker color. Look for brands that specify ‘Dutch processed’ or ‘alkalized’ for that characteristic rich chocolate depth and a tender cookie crumb.
Gourmet Chocolate Sablé Torchon with Sea Salt
Ingredients
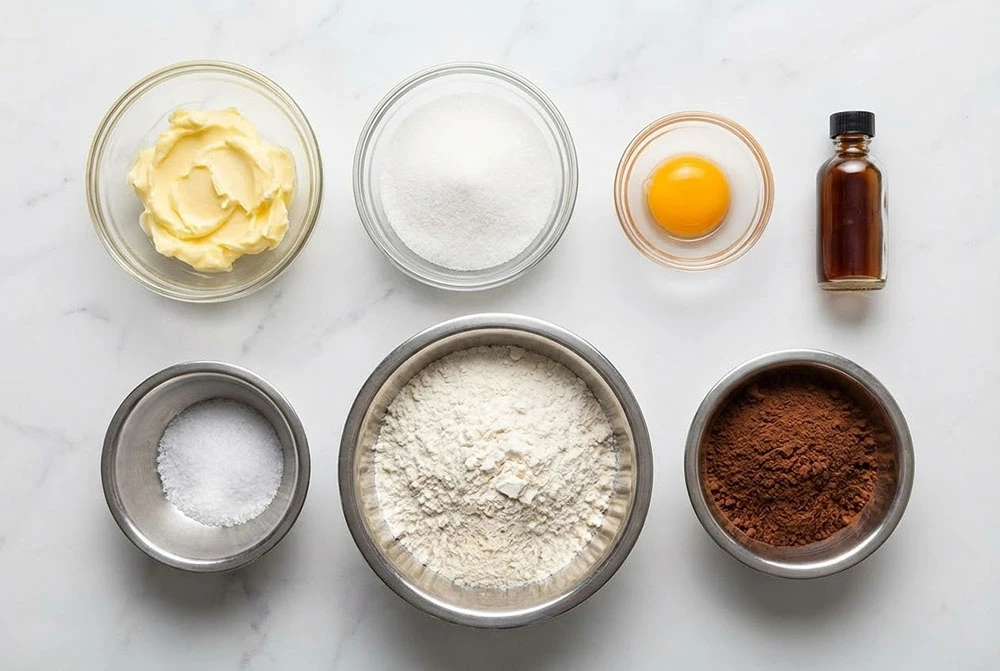
Sablé Dough
- 8 oz unsalted butter softened
- 6 oz granulated sugar
- 1 large egg yolk
- 1 tsp vanilla extract
- 1/2 tsp fine sea salt
- 10 oz all-purpose flour
- 2 oz unsweetened cocoa powder Dutch processed
Finishing
- Flaky sea salt e.g., Maldon
Instructions
- In a large bowl, cream the softened butter and granulated sugar together using an electric mixer on medium speed until light and fluffy, about 3-4 minutes. Scrape down the sides of the bowl as needed.
- Add the egg yolk, vanilla extract, and fine sea salt. Mix on low speed until just combined.
- In a separate bowl, whisk together the all-purpose flour and cocoa powder to ensure even distribution.
- Gradually add the dry ingredients to the wet ingredients, mixing on low speed until just incorporated. Be careful not to overmix. The dough will be crumbly.
- Turn the dough out onto a clean work surface. Use your hands to bring it together into a cohesive ball.
- Place a large sheet of parchment paper on your work surface. Place the dough onto the parchment paper.
- Using the parchment paper as a guide, shape the dough into a tight, uniform cylinder, approximately 2 inches in diameter. Ensure there are no air pockets. Press firmly and evenly.
- Once the cylinder is formed, wrap it tightly in the parchment paper, twisting the ends like a candy wrapper to maintain its shape and prevent it from expanding during chilling.
- Refrigerate the dough cylinder for at least 2 hours, or until very firm. This is crucial for clean slicing.
- Preheat your oven to 350°F (175°C). Line baking sheets with parchment paper.
- Remove the chilled dough cylinder from the refrigerator. Unwrap it from the parchment paper.
- Using a sharp chef's knife, carefully slice the dough cylinder into uniform rounds, about 1/4-inch thick. Aim for geometric precision.
- Arrange the cookie slices on the prepared baking sheets, spacing them about 1 inch apart.
- Sprinkle the tops of the cookies lightly with flaky sea salt.
- Bake for 12-15 minutes, or until the edges are set and the centers are still slightly soft. The cocoa powder can make it difficult to judge browning, so watch the edges closely.
- Allow the cookies to cool on the baking sheets for 5 minutes before carefully transferring them to a wire rack to cool completely.
Notes
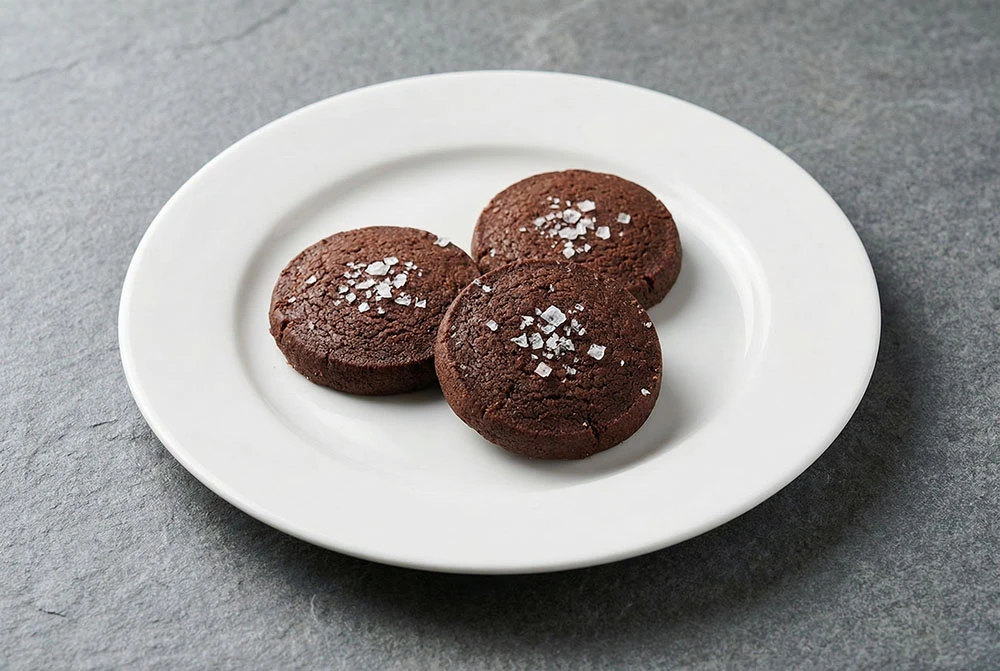
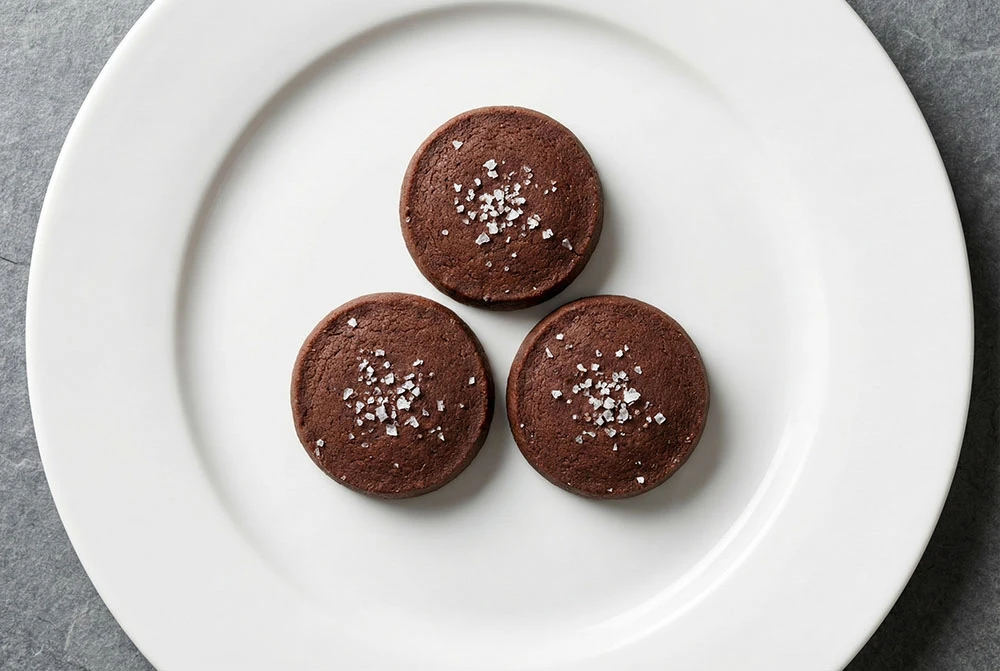
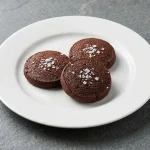
Plating & Presentation
To present these exquisite Chocolate Sablé Torchon cookies with the elegance they deserve, simplicity is key. Arrange three to five cookies artfully on a clean, cool white ceramic plate. Consider placing them slightly overlapping in a subtle curve or a neat fan. The inherent beauty of their uniform shape and deep chocolate hue needs no embellishment. A final, delicate sprinkle of flaky sea salt just before serving provides a glistening contrast and a delightful textural counterpoint. Ensure the rim of the plate is impeccably clean; a quick wipe with a damp linen cloth is the professional’s final touch, signifying precision and care.